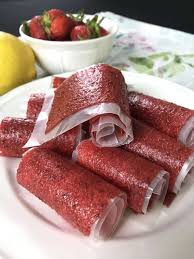
How To: Thin Crust Pizza Dough

This recipe is very similar to my other pizza dough recipe, but it makes less dough, and you don’t proof it before baking. This leads to a nice, thin crust that bakes up well and holds up to multiple toppings.

  • 2 1/4 teaspoons active dry yeast
  • 1/2 teaspoon granulated sugar
  • 1 cup warm water, about 110°
  • 1 teaspoon salt
  • 1 tablespoon olive oil
  • 2 1/2 cups bread flour*

Preheat oven to 450°. In a large bowl or bowl of stand mixer, mix together yeast, water and sugar and allow to sit for 10 minutes until foamy**. Stir the olive oil and salt into the yeast mixture.  Then, using the dough hook on your stand mixer, or a sturdy spoon if using a bowl, mix in the flour 1/2 cup at a time until the dough has started to pull away from the sides of the bowl. If using a stand mixer, mix the dough with the dough hook for 3 minutes on medium speed until the dough has completely pulled away from the sides and is smooth.  If you are not using a stand mixer, place the dough onto a lightly floured surface and knead for 5 minutes until smooth. Shape the dough into one ball, and slice in half evenly. At this point you can roll out both balls of dough for two 10 -12-inch pizzas. Or, store the remaining dough in the refrigerator for up to 5 days, or the freezer for up to one month. Roll the dough out to 1/4 inch thickness on a lightly floured surface and transfer to prepared pan.  At this point you can add whatever toppings you like and bake for 10-15 minutes, depending on the size of your pizza.

*All purpose flour is fine too if that’s all you have in the house!

**I use instant yeast so you can just add all the ingredients to the bowl and proceed with mixing.

How To: Homemade Jiffy Cornbread Mix

download (1)
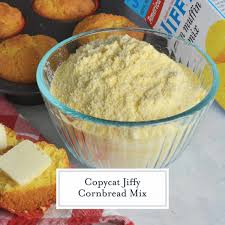
I recently made a recipe that called for Jiffy cornbread mix but I didn’t have any on hand. Enter the Internet! This recipe is very easy to make and likely uses ingredients you already have in your pantry. Try it in Creamed Corn Spoonbread today!

  • 2/3 cup all purpose flour
  • 1/2 cup yellow cornmeal
  • 1/3 cup sugar
  • 1 tablespoon baking powder
  • 1/2 teaspoon salt
  • 2 tablespoons vegetable oil

Combine the first five ingredients until well incorporated. Whisk in the vegetable oil until no lumps remain. Add this into your recipe that is calling for the box mix.

If you want to just make the muffins themselves, combine the dry mixture with 1 egg and 1/3 cup of milk. Mix until just incorporated and fill well-greased muffin tins about 1/2 full. Bake at 400 for 15-20 minutes.

How To: Homemade Pizza Dough

The-Best-Pizza-Dough-Recipe-5
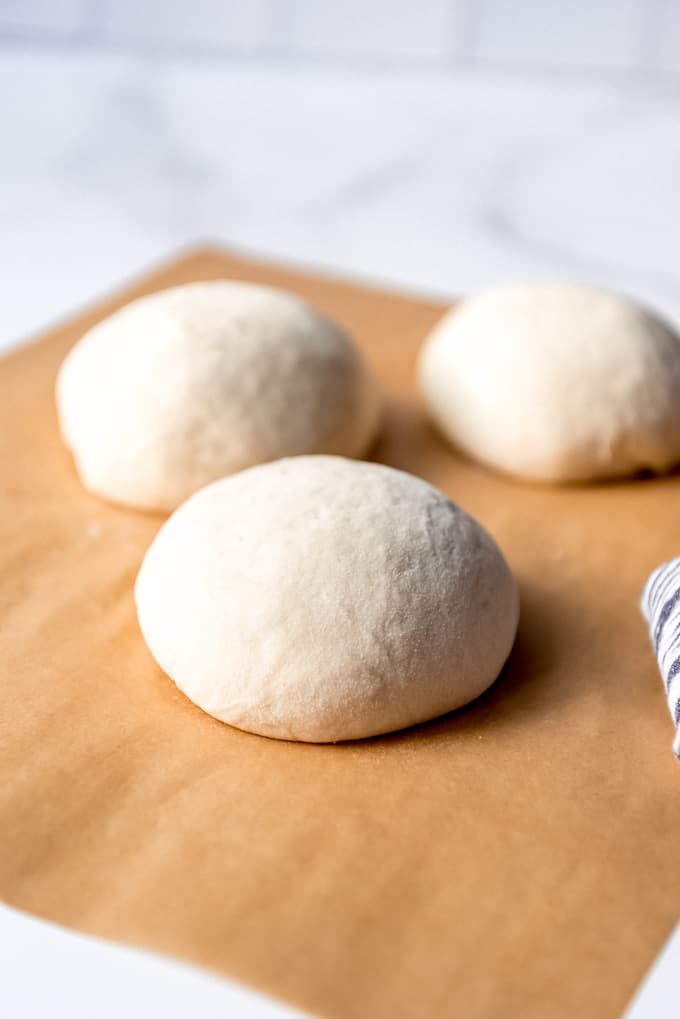
Another first for me during this quarantine is homemade pizza dough. I have really been making an effort to not shy away from using yeast so this was a logical next step. Again, I used instant yeast so it came together really quickly. It also made enough dough for two pizzas so you can make two pizzas at once or save it for another day. Recipe and photo courtesy of houseofnasheats.com

  •  1 1/2 cups warm water (110 degrees F)
  •  2 teaspoons sugar
  •  2 1/4 teaspoons (1 package) active dry yeast or instant yeast
  •  3 1/2 to 4 cups bread flour (or all-purpose if that’s all you have)
  •  2 tablespoons olive oil
  •  2 teaspoons salt

Combine warm water, sugar, and yeast in a large bowl. If using active dry yeast, let it proof for 5 minutes until foamy. If using instant yeast, there is no need to wait for the yeast to proof. Add flour, olive oil, and salt and stir well with a wooden spoon or mix in a stand mixer with a dough hook until combined. Knead for 5 minutes using a stand mixer fitted with a dough hook attachment or 6-7 minutes by hand until smooth and elastic. The dough will be tacky and slightly sticky, but should still be manageable to work with. Drizzle a clean bowl with a little olive oil, then place the ball of dough in the bowl and turn it to coat in the oil. Cover with plastic wrap or a clean cloth and let rise for at least 30 minutes (or up to 1 1/2 hours) until doubled in size.

Divide the dough into 2 or 3 balls (or more if you want to make personal-size pizzas). Roll, pat, or stretch the dough out until it is roughly 1/4″ thick, then top with 1/4-1/2 cup of pizza sauce, freshly grated mozzarella cheese, and other toppings.

How To: Homemade Pita Bread

delish-190621-homemade-pita-0144-portrait-pf-1567692673
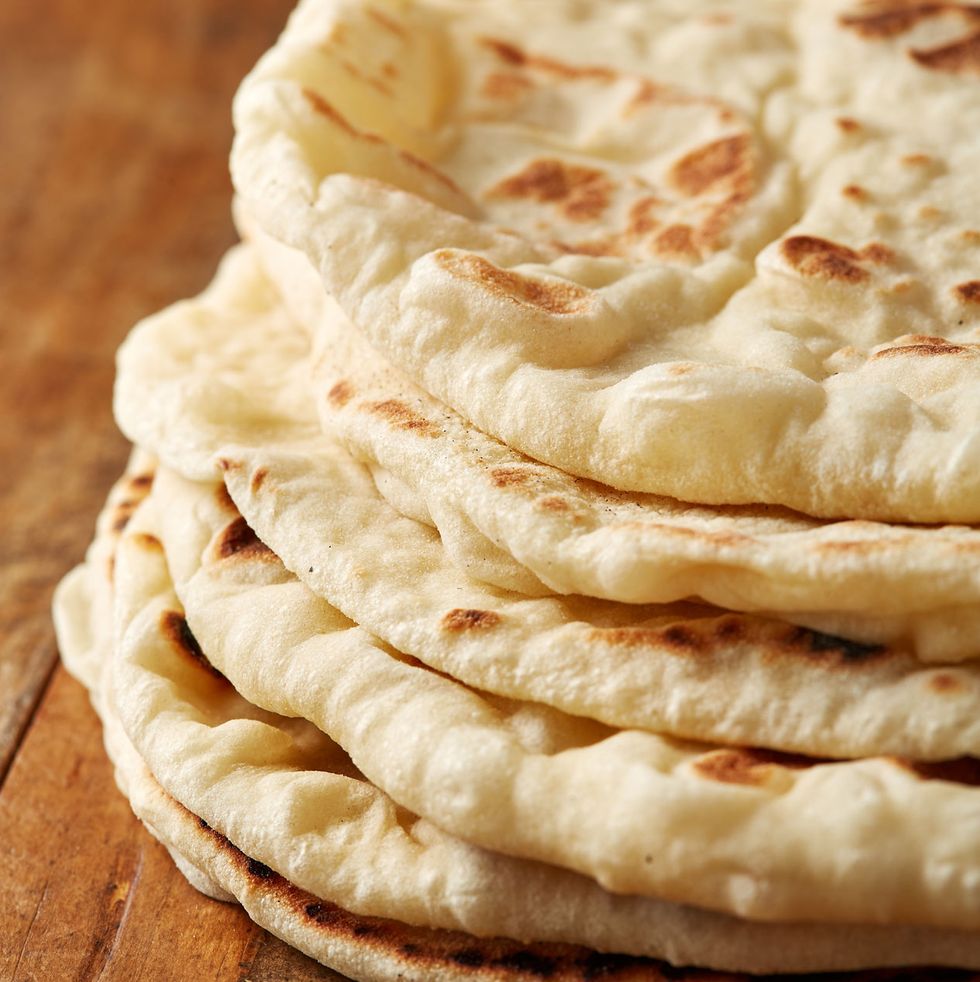
One of my favorite sandwiches of all time is a gyro, and good pita bread is so essential to that equation. I found an easy homemade recipe on delish.com and it was really good and came together really easily. If you are not comfortable with baking with yeast this is a great recipe to get your feet wet with because it is very forgiving.

  • 1 cup warm water
  • 2 teaspoon active dry yeast (I used instant)
  • 1 teaspoon granulated sugar
  • 3 cups all-purpose flour, divided
  • 1 tablespoon olive oil
  • 1 1/2 teaspoon kosher salt

In a large bowl, combine warm water, yeast, and sugar and stir until dissolved. Stir in ½ cup flour and let sit for 15 minutes, until mixture foams. (If you are using instant yeast, you don’t have to mix it separately, just add it directly to the the dry ingredients.) Add oil, salt, and 2 cups flour (reserving ½ cup) and stir with a wooden spoon until a shaggy mass forms. Dust a clean surface with some of reserved flour and knead until smooth and elastic, about 7 minutes, adding more of the reserved flour if the dough is too sticky. Dough should be soft and moist. (You can cover the dough and let rest 10 minutes if you need a rest from kneading.) Place dough in a clean large bowl and cover with plastic wrap. Leave in a warm place until dough has doubled in size, about 1 hour.  Lightly dust a clean surface with flour. Punch down dough and turn it out onto surface. Divide dough into 8 pieces and roll into balls. Cover with a towel or plastic wrap and let rest 10 minutes.  Preheat a large cast-iron skillet over medium heat. Working one at a time, roll each round into a ¼”-thick circle about 8” wide, sprinkling dough with extra flour if it starts to stick.  Cook each pita one at a time in skillet until an air pocket balloons, then flip, and cook 1 minute more. Cover baked pitas with a clean kitchen towel to keep warm.

How To: Savory Pie Crust

downloadWith Christmas guests coming I took the opportunity to make a few new recipes, including a chicken pot pie.  I figured a pie crust made out of lard would be the perfect complement and sure enough it was delicious. Even better was the fact that it didn’t require a ton of chilling.

  • 2 cups flour
  • 1 teaspoon salt
  • 2/3 cup lard
  • 1/3 cup ice water

Whisk flour and salt together in a large bowl. Cut in the lard with a knife or pastry blender until the mixture resembles coarse crumbs. Sprinkle in water, 1 tablespoon at a time, blending gently with a fork or pastry blender until all flour is moistened and dough almost cleans the sides of the bowl. Divide the dough in half and shape flattened rounds. Wrap in plastic and refrigerate for at least 1 hour.

How To: Tzatziki Sauce

tzatziki-sauce-with-pita.jpg.839x0_q71_crop-scale
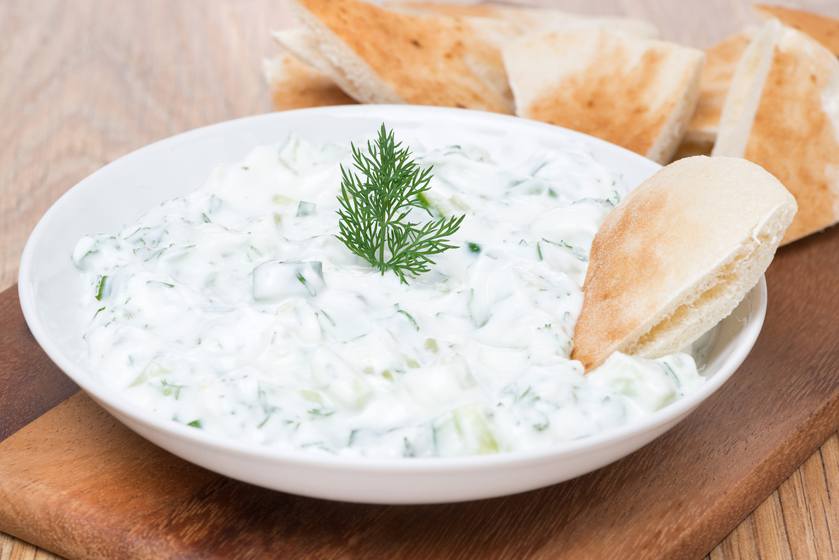
I have come to love making my own sauces for things, whether it’s ranch or barbeque and this homemade Tzatziki sauce is no exception. It was perfect with the gyros and I will definitely be making it again. One note I did have is the amount of sauce made by the recipe will far outstrip the amount of meat in the recipe as written so next time I will halve the recipe. Courtesy of 365daysofcrockpot.com.

  • 1 cup plain Greek yogurt
  • 1 cup diced or shredded cucumber, seeded
  • 1 tablespoon dried dill or 2 tablespoon fresh dill
  • 1/4 teaspoon salt
  • 1 garlic clove, minced
  • Salt and pepper

Cream together all of the ingredients until well combined. Serve with your favorite Greek dishes.

How To: Cream Cheese Frosting

download
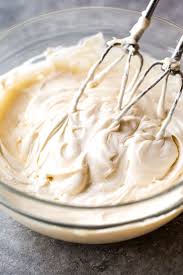
This next post is another entry in my how to series. I use this for basic frosting or garnish recipes that can be used for any recipe. Cream cheese frosting is delicious on some many different desserts: carrot cake, pumpkin muffins, banana blondies.

  • 8 oz cream cheese, softened
  • 1 stick butter, softened
  • 1 teaspoon vanilla
  • 4 cups powdered sugar, or to taste

Cream together the cream cheese and butter until light and fluffy. Add in vanilla and mix until incorporated. Gradually add in the powdered sugar until you reached the desired sweetness. I tend to use less powdered sugar than most recipes call for, but be sure to taste as you go so you can make it just how you like it.

How To: Stabilized Whipped Cream

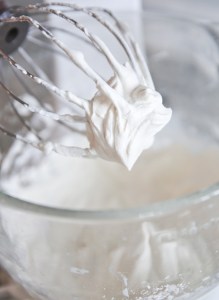
I love a homemade whipped cream, but they can be pretty fragile if  not eaten right away. That was the problem I was looking to solve this past week when I had 3 pies needing whipped cream that weren’t going to be eaten for several hours. After much internet scouring, the consensus seemed to be adding gelatin to the whipped cream to help it last. After trying it I can say without doubt that it was successful.  The cream still tasted great, and held up beautifully.

  • 1 teaspoon unflavored gelatin (like Knox, found near Jell-o in the baking aisle)
  • 4 teaspoons cold water
  • 1 cup heavy cream
  • 1/2 cup powdered sugar (more or less to taste)
  • 1/2 teaspoon vanilla extract

Place cold water in small bowl and sprinkle gelatin over it. Let sit for 5 minutes. While it’s sitting, place heavy cream, powdered sugar, and vanilla in the bowl of a stand mixer with the whisk attachment or in a mixing bowl if using an electric beater. Once gelatin is set, place bowl in microwave and heat until gelatin turns to liquid, about 10 seconds. Turn mixer on to start beating cream. Let it run for about 1 minute and then with the mixer on high, very slowly pour the melted gelatin in, in a small steady stream. Continue beating cream until you reach medium-stiff peaks. Spread or pipe whipped cream as desired.

How To: Graham Cracker Crust

I was laying in bed last night trying to fall asleep and I started thinking about my website and how I could use a section of how to’s. Staple recipes for crust and things that could be used throughout different recipes without having to go back to a specific one. Well, here is the first one: Graham Cracker crust. This crust can be used in so many different desserts, from cream pies to cheesecake to icebox pies. You could also sub out graham crackers for vanilla wafers 1:1.

  • 1 1/2 cups graham cracker crumbs (about 10 sheets)
  • 2 tablespoons sugar
  • 1 tablespoon brown sugar
  • 7 tablespoons melted butter

Use a food processor to grind up the graham cracker sheets (or use pre-made crumbs). Combine them in a bowl with the sugar and melted butter, then press them into your greased baking dish. As you can see in the picture, I recommend using a flat-bottomed glass or measuring cup to make sure you have an even layer in the bottom of your dish. All that’s left as this point is to bake per your recipes instructions.

How To: Flaky Pie Crust

This was the second homemade pie crust I have made at Thanksgiving and I was so pleased with how it turned out. I used to be terrified of making my own crusts, but with practice and step by step directions it has gotten much better. Not to mention I truly believe the pies taste better with a homemade crust. This one differs from the other on my site in that it uses shortening and butter, instead of all butter. Next year I’ll have to make a batch of each and see which one I like better. Recipe and photo courtesy of sallysbakingaddiction.com

  • 2 1/2 cups all-purpose flour, scooped and levelled
  • 1 1/4 teaspoons salt
  • 6 tablespoons unsalted butter, chilled and cubed
  • 3/4 cup vegetable shortening, chilled
  • 1/2 cup ice water

Mix the flour and salt together in a large bowl. Add the butter and shortening. Using a pastry cutter or two forks, cut the butter and shortening into the mixture until it resembles coarse meal (pea-sized bits with a few larger bits of fat is OK). Measure 1/2 cup  of water in a cup. Add ice. Stir it around. From that, measure 1/2 cup of water– since the ice has melted a bit. Drizzle the cold water in, 1 Tablespoon at a time, and stir with a rubber spatula or wooden spoon after every Tablespoon added. Do not add any more water than you need to. Stop adding water when the dough begins to form large clumps. I always use about 1/2 cup of water and a little more in dry winter months. Transfer the pie dough to a floured work surface. The dough should come together easily and should not feel overly sticky. Using floured hands, fold the dough into itself until the flour is fully incorporated into the fats. Form it into a ball. Divide dough in half. Flatten each half into 1-inch thick discs using your hands. Wrap each tightly in plastic wrap. Refrigerate for at least 2 hours (and up to 5 days).

When rolling out the chilled pie dough discs to use in your pie, always use gentle force with your rolling pin. Start from the center of the disc and work your way out in all directions, turning the dough with your hands as you go. Proceed with the pie per your recipe’s instructions.