Spinach and Artichoke Dip

This past Christmas I hosted a party for my son’s football team and when I was planning the food I knew I wanted a spinach and artichoke dip. My first stop was cookiesandcups.com because I always love her recipes and this one was no exception. Rich and decadent, it was the perfect complement to pita chips and veggies. I did add panko bread crumbs for a little crunch on top! Photo courtesy of cookiesandcups.com

  • 1 (12- ounce) package frozen chopped spinach
  • 2 (14- ounce) cans artichoke hearts, packed in water
  • 3 tablespoons diced chives
  • 3 cloves garlic, minced
  • 1 (8- ounce) block cream cheese, cubed at room temperature
  • 2/3 cup fresh grated Parmesan, divided
  • 1 cup grated low moisture mozzarella, divided
  • 1/3 cup crumbled feta cheese
  • 1 cup sour cream
  • 2/3 cup mayonnaise
  • 1/2 cup Panko bread crumbs 
  • 1/2 teaspoon fresh ground black pepper
  • 1/2 teaspoon seasoned salt (or kosher salt)
  • 1/4 – 1/2 teaspoon cayenne pepper

Preheat the oven to broil. Coat a 2- quart casserole dish with nonstick spray and set aside. Cook the spinach according to package directions, or microwave in a microwave-safe bowl in 1 minute increments until thawed. Place the spinach in a thin towel or cheesecloth and squeeze out all excess water. Place the spinach in a medium saucepan and set aside. Drain the artichokes. Place the artichokes in the same towel or cheesecloth and squeeze out all the excess water. Place the artichokes on a cutting board and coarsely chop. Add the artichokes, chives, garlic, cream cheese, 1/3 cup Parmesan, 1/2 cup mozzarella, feta, sour cream, mayonnaise, pepper, salt, and cayenne into the saucepan with the spinach. Heat the mixture over medium heat, stirring frequently until warmed through and all the cheese is melted, approximately 10 minutes. Transfer the dip into the prepared dish. Top with the remaining 1/2 cup mozzarella, 1/3 cup Parmesan and bread crumbs. Place under the broiler until the cheese is lightly toasted, about 1 minute. Serve immediately with pita chips, fresh vegetables, or bread.

Philly Cheesesteak Sliders

I realized recently that it had been far too long since I had updated my website so prepare for a slew of new recipes! This one is the perfect party/football food and the second I tried one I knew it would be in frequent rotation. Recipe and photo courtesy of cookiesandcups.com. The one change I made was to use Gary’s Frozen Quick Steak that I get at Sam’s Club. It was the perfect cut, but if you can’t find it, deli roast beef is what the recipe originally called for.

  • 24 slider rolls
  • 2 tablespoons olive oil
  • 1/2 cup + 2 tablespoons butter, divided
  • 1 large Vidalia onion, thinly sliced
  • 2 green bell peppers, thinly sliced (optional)
  • 3 cloves garlic, minced
  • 2 (1- ounce) packages dry onion soup mix
  • 1 teaspoon kosher salt
  • 1 teaspoon ground black pepper
  • 1 1/2 pounds deli roasts beef, sliced into strips
  • 5 slices white American cheese, cut in half
  • 5 slices deli provolone, cut into 1 1/2- inch slices
  • 1 teaspoon Worcestershire sauce

Preheat the oven to 350°F. Line an 11×15- inch jelly roll pan with foil. Coat with nonstick spray. Without separating the individual rolls, use a serrated knife to cut the slider rolls in half placing the bottoms of the rolls into the prepared pan. Set the tops aside. In a large skillet, heat the olive oil and 2 tablespoons butter over medium heat. Add in the onions and green peppers and cook until softened and onions and translucent, 8 – 10 minutes. Add in the garlic, 1 packet of onion soup mix, salt, and pepper and stir to incorporate. Add in the sliced roast beef and stir, breaking apart any clumps of meat. Cook for 2 minutes, until the steak is warmed. Remove the pan from the heat. Evenly distribute the steak mixture on top of the slider rolls. Place the cheese slices on top of the meat, alternating the American and Provolone slices, so each slider has both types of cheese on top. Place the tops of the slider rolls on the cheese and press down slightly. Place the 1/2 cup butter, and remaining packet of onion soup mix in a small microwave-safe bowl. Heat for 30 – 45 seconds until melted. Stir to combine and drizzle the mixture evenly on top of the slider buns.  Cover the pan tightly with foil. Place the pan on a large cookie sheet and bake for 15-20 minutes, until the cheese is melted. Remove the pan from the oven and keep covered for 5-10 minutes before uncovering and serving.

Roasted Broccoli

I go back and forth with myself on whether or not to post recipes like the one I’m about to share with you, because this isn’t a multi-step, high ingredient list recipe. It’s a wing it and every time is different recipe. My hope is that by including it, it will spark your appetite and encourage you to roast all the veggies.

  • 2 lbs broccoli florets (I always trim the stems off…)
  • avocado oil (my new favorite)
  • salt
  • pepper
  • fresh grated Parmesan cheese

First, preheat your oven to 425. If you have a convection setting, use that! Line a large rimmed baking sheet with parchment or foil. In a bowl, combine your broccoli with a generous drizzle of avocado oil. I always drizzle, then shake/stir to make sure everything is coated. If your broccoli is still looking dry, add some more oil. Pour the broccoli onto the baking sheet, and I like to bunch mine all together so that when I shred the cheese on top it almost forms a little crust on top. Before adding the grated Parmesan, season with salt and pepper to taste. I grate my cheese right there over the broccoli. Roast for about 20 minutes, checking on it starting around the 15 minute mark, until the cheese is brown and you’ve got lovely roasted brown bits on your broccoli. Serve with your favorite protein.

Homemade Granola

One of my husband’s favorite snacks is Greek yogurt with granola and blueberries. While we have tried many commercial mixes, including a really yummy one from a nice lady in Arizona, it was cost prohibitive to buy in the bulk we needed. Enter, The Pioneer Woman’s homemade granola recipe! I have been making Ree’s recipes for over 10 years now and they have not steered me wrong. This one is no exception. One of the things I like about it is it’s versatility; you can add/remove and tweak the recipe to make it your own.

  • 6 cups old fashioned oats (not quick oats)
  • 1/4 cup light oil (not olive)
  • 4 tablespoons butter, melted, plus more for greasing
  • 1 teaspoon salt
  • 1 cup brown sugar
  • 1/2 cup honey
  • 1/4 cup apple juice
  • 1/4 cup molasses
  • 3 teaspoons vanilla extract
  • 1 1/2 cup Rice Krispies
  • 1 cup wheat germ
  • 1/2 cup pecans, chopped
  • 1/4 cup almonds, slivered
  • 1 cup dried fruit of choice, optional

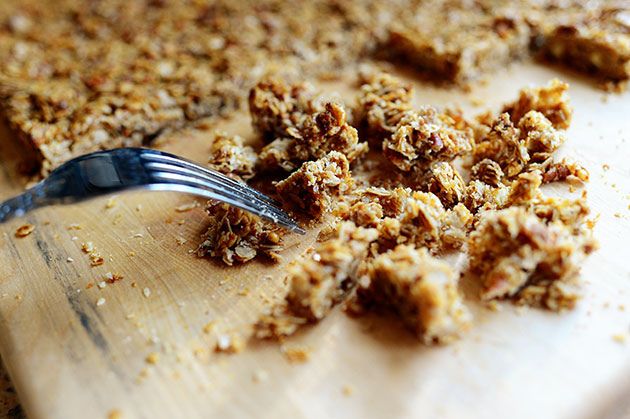
Preheat the oven to 350 degrees F. In a bowl, toss the oats with the oil, melted butter and salt. Spread the mixture out on 2 baking sheets and toast in the oven for 15 to 20 minutes, shaking the pan twice and making sure they don’t burn. Remove from the oven and set aside. Reduce the heat to 325 degrees F. In a medium saucepan, combine the brown sugar, honey, apple juice and molasses. Heat the mixture slowly, stirring until all combined. Stir in the vanilla. Toss together the toasted oats, rice cereal, wheat germ, pecans, almonds and fruit if using. Pour in the sugar mixture, stirring as you pour. Toss to combine; it will be sticky. Press into 1 baking sheet (thoroughly greased with butter, or line pan with foil and grease foil) and bake until golden, about 20-25 minutes. Remove from oven and let cool. As it is cooling I like to start breaking it up into small pieces as my husband doesn’t like big chunks of granola. The longer you let it sit as it cools the crunchier it will get and be harder to break into pieces. Store in an airtight container.

Easy Coconut Rice

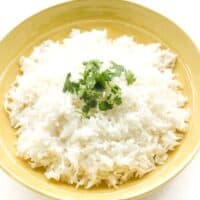
Rice has long been one of my favorite foods. When I was young and we would go to my grandmother’s house she would always make a side of rice just for me to go with whatever meal we were having. That preference has been transferred to my son so it makes frequent rotations in our meal plans. I love this one because with very few ingredients you get rice that is perfectly seasoned and so easy. Recipe and photo courtesy of aheadofthyme.com

  • 2 cups jasmine rice
  • 400 ml coconut milk
  • 1 1/2 cups water
  • 1 teaspoon salt
  • 1 teaspoon sugar

Using a bowl and fine mesh strainer, rinse the rice with cold water until clear. (This step is optional if you want stickier rice for something like sushi. I normally skip this step because of time management, but the last time I made it I took the time the rinse the rice and it was definitely fluffier.) After the rice is rinsed, add it to a pot with the water, coconut milk, salt and sugar. Bring to boil, then reduce to low, cover and cook for 20 minutes. After 20 minutes, leave the lid on and let the rice sit for 5 additional minutes. Fluff with a fork and serve.

Elevated Cinnamon Rolls

A while back there was a trend on TikTok where you take the somewhat uninspiring tube of cinnamon rolls and jazz them up with extra heavy cream and butter and sugar and cinnamon. I made them one day when all my family was in town and they were so delicious I haven’t made them any other way since. At this point I figured it was high time to get it on the website so I don’t have to troll social media for the recipe any more. I have made this with frozen and refrigerated cinnamon rolls and both work great.

  • 2 cans cinnamon rolls
  • 1 cup heavy cream
  • 1 stick of butter
  • 1 tablespoon cinnamon
  • 3/4 cup light brown sugar

Preheat your oven to 350. Grease a 9×13 pan, then lay out your cinnamon rolls. In a microwave safe bowl, melt your butter. While your butter is melting, pour 1 cup of heavy cream all over the cinnamon rolls. Once your butter is melted, add the cinnamon and brown sugar and stir until well combined. Pour the mixture over the cinnamon rolls and then cover the dish with foil. Bake for about 45 minutes until the rolls are cooked and the cream is mostly absorbed. Serve with the icing that came in the tube.

Banana Bread Brownies

I have a problem. I buy way too many bananas, and then end up with more overly ripe bananas than I can use. On one such occasion, I decided to make a bunch of banana desserts and take them to work so my co-workers would eat it all up for me. While scouring Pinterest for ideas, I saw this recipe and it was a huge hit. It took my a few months, but here it is on the website at last. Recipe and photo courtesy of 100krecipes.com

For the Brownies:

  • 1 1/2 cups sugar
  • 1 cup sour cream
  • 1/2 cup butter, softened
  • 2 eggs, room temperature
  • 3 bananas, mashed
  • 2 teaspoons vanilla
  • 2 cups all purpose flour
  • 1 teaspoon baking soda
  • 3/4 teaspoon salt
  • 1/2 cup pecans, chopped

For the Frosting:

  • 1/2 cup butter
  • 3 cups powdered sugar
  • 1 1/2 teaspoon vanilla
  • 3 tablespoons milk

Preheat the oven to 375°F. Grease a 9×13 inch baking pan with non-stick cooking spray. In a mixing bowl, mix together sugar, sour cream, softened butter and eggs using an electric mixer. Beat until well combined. Then, add mashed bananas and vanilla extract. Mix until combined. Add the dry ingredients to the batter. Mix until combined. Then, add chopped pecans. Pour the banana batter into the prepared baking pan. Bake in the preheated oven for 20-30 minutes or until ready. Check the readiness of the brownies using a toothpick inserted in the center, if it comes out clean – the brownies are ready. Remove the baking pan from the oven. Let it cool slightly. While the brownies are cooling, prepare the frosting. In a saucepan, melt butter and heat until medium brown color. Turn off the heat and add powdered sugar (1 cup at a time), stir until combined after each addition. Then, add milk and vanilla extract. Mix until combined. Pour the frosting over the brownies. Spread evenly. Let the banana bread brownies cool completely.

Buttery Glazed Green Beans

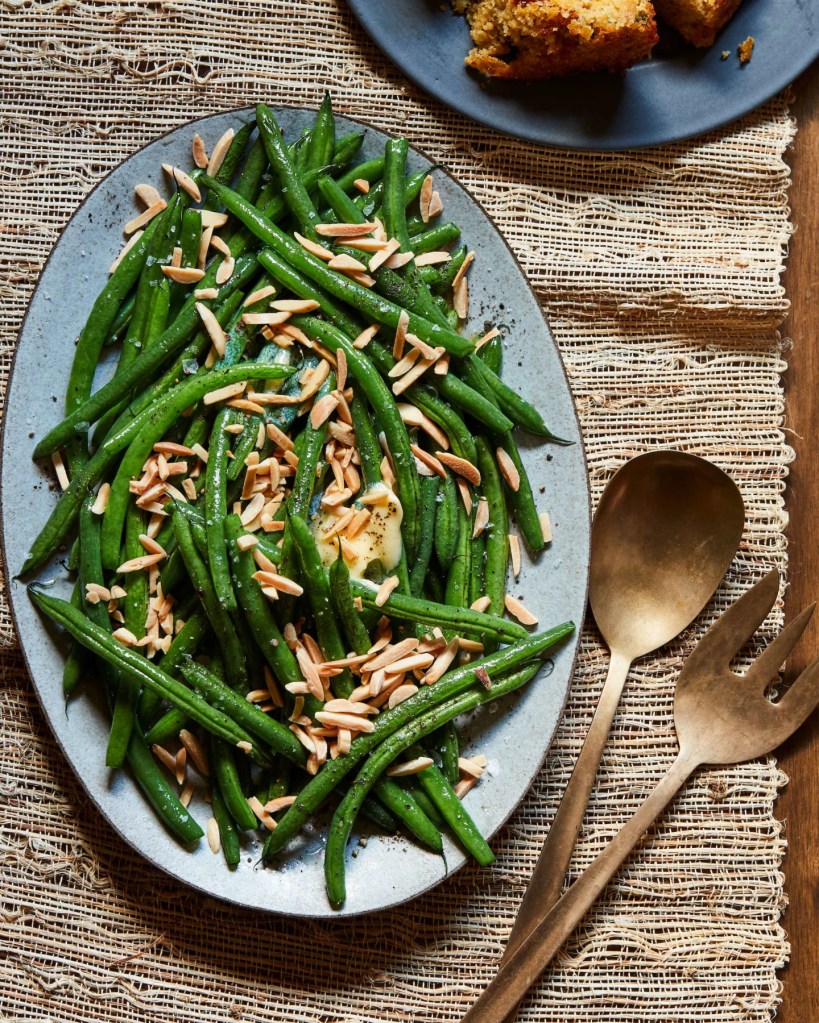
Every year I vow to do better meal planning and this year was no exception. I busted out all the cookbooks in my cupboard and did a great job of trying new recipes…for about 3 months. It started to fall apart when the kids after school activities picked up and never quite recovered. That early year diligence did lead to some standard rotations in my meals, one of which was this green bean recipe. It comes out of Chrissy Teigan’s Cravings Vol. 1 cookbook and is so simple and delicious. Recipe and photo courtesy of Cravings.

  • 1 cup water
  • 1/4 cup sugar
  • 1 teaspoon kosher salt
  • 1 pound green beans, trimmed
  • 2 tablespoons unsalted butter
  • 1/4 teaspoon black pepper
  • 1/4 cup slivered almonds, toasted, optional

In a large skillet with a tight-fitting lid, combine the water, sugar, and salt and bring to a boil, stirring until the sugar is dissolved. Add the green beans, cover, and cook over medium-high heat until the sugar water begins to reduce, 7 to 9 minutes. Uncover and continue to cook, tossing the beans, until the sugar reduces to a very light syrup and the beans are no longer crisp but somehow miraculously aren’t mushy, making sure it doesn’t burn (add a splash of water if necessary), 7 to 9 minutes. Transfer to a serving dish and top with the butter and pepper. Season with more salt to taste. If using, garnish with the almonds and serve.

Breadsticks a la Olive Garden

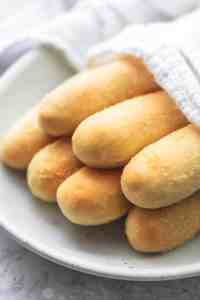
The copycat cookbook I have has some really great recipes, and this breadstick is one of my families favorites. With only one rise of about 45 minutes, it is an easy one to whip up on a weeknight. Also, don’t skimp on the buttery topping, because although it sounds like a lot, it is not overpowering.

For the Dough:

  • 2 tablespoons sugar
  • 2 1/4 teaspoons yeast, I use instant
  • 1 1/2 cups warm water, 105-115 degrees
  • 3 1/2 cups all purpose flour, adding more if necessary
  • 1 tablespoon salt
  • 2 tablespoons butter, melted

For the Buttery Topping:

  • 1/2 cup butter, melted
  • 2 teaspoons garlic powder
  • 1 teaspoon salt

In a large bowl, dissolve sugar and yeast in warm water and let sit for 10 minutes. (If using instant yeast, skip this step and just add the sugar, water, and yeast to the rest of the ingredients.) Add flour ,salt, and melted butter to the yeast mixture. Mix with a wooden spoon until fully combined. Knead dough for a few minutes, until dough is smooth and not sticky. Spray a cookie sheet with nonstick cooking spray, or line with parchment. Pull off pieces of dough and roll into strips. Cover the dough with a light towel and let rise in a warm place for 45 minutes.

Preheat oven to 400. Bake breadsticks for 6-7 minutes, then brush with the buttery topping. Return to the oven for 6-7 more minutes, or until golden brown. Remove from oven and brush with the rest of the buttery topping. Serve immediately.

Copycat Superfood Salad

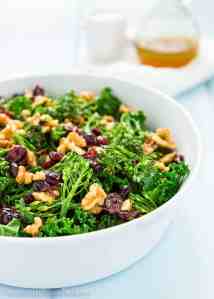
For a while, Chick-fil-A had a salad on the menu called the superfood salad. It had kale and broccolini, dried cherries and mixed nuts. It was such a delicious salad and I was super bummed when they got rid of it. Luckily, I found a copycat recipe in a cookbook by Six Sisters’ Stuff. I leave out the broccolini, but other than that it is a dead ringer. It also keeps for a couple of days in the fridge so it’s nice to munch on through the week.

  • 6 cups chopped kale
  • 1/4 cup apple cider vinegar
  • 1/3 cup olive oil
  • 1 tablespoon honey
  • 2 tablespoons maple syrup
  • 1/2 teaspoon sugar
  • 1/4 teaspoon freshly ground black pepper
  • 1/4 teaspoon salt

Optional Toppings

  • 1/3 cup candied nut of your choice
  • 1/3 cup granola
  • 1/3 cup sunflower seeds
  • 1/2 cup dried cherries

In a medium large bowl, combine kale, sunflower seeds, dried cherries, and nuts. In a small bowl, whisk together cider vinegar, olive oil, honey, maple syrup, sugar, pepper and salt. Pour dressing over salad and toss until leaves are shiny and coated. Refrigerate for 3 hours, or let sit overnight. When serving, top with a few more cherries and nuts. I also like to add chicken or salmon for some protein.